Manual hand crank
Start here if: batches are occasional and physical cranking is acceptable.
Check stable mounting and the effort required for your planned task.
 Meat Grinders
A meat grinder feeds pieces of meat through an auger-driven knife and perforated plate. Start with how the grinder is driven and how often you will use it; refine the choice using plate fit, cleanability, and safe feeding.

There is no universal winning type. The practical fork is between effort, an existing compatible drive source, and a dedicated motor. These are category-level starting points, not measured speed or capacity rankings.
Start here if: batches are occasional and physical cranking is acceptable.
Check stable mounting and the effort required for your planned task.
Start here if: you want a dedicated powered grinding workflow, especially for repeated batches.
Check the supported duty cycle, feed guards, and disassembly - not wattage alone.
Start here if: you already have an appliance with a compatible powered attachment hub.
Confirm host compatibility and operating limits; heads are not universally interchangeable.
All three use a rotating feed-and-cut mechanism. Their primary difference is the source of rotation: a person's hand, a motor built into the grinder, or a motor housed in another appliance. That distinction changes setup and effort, not the plate's definition of grind texture.
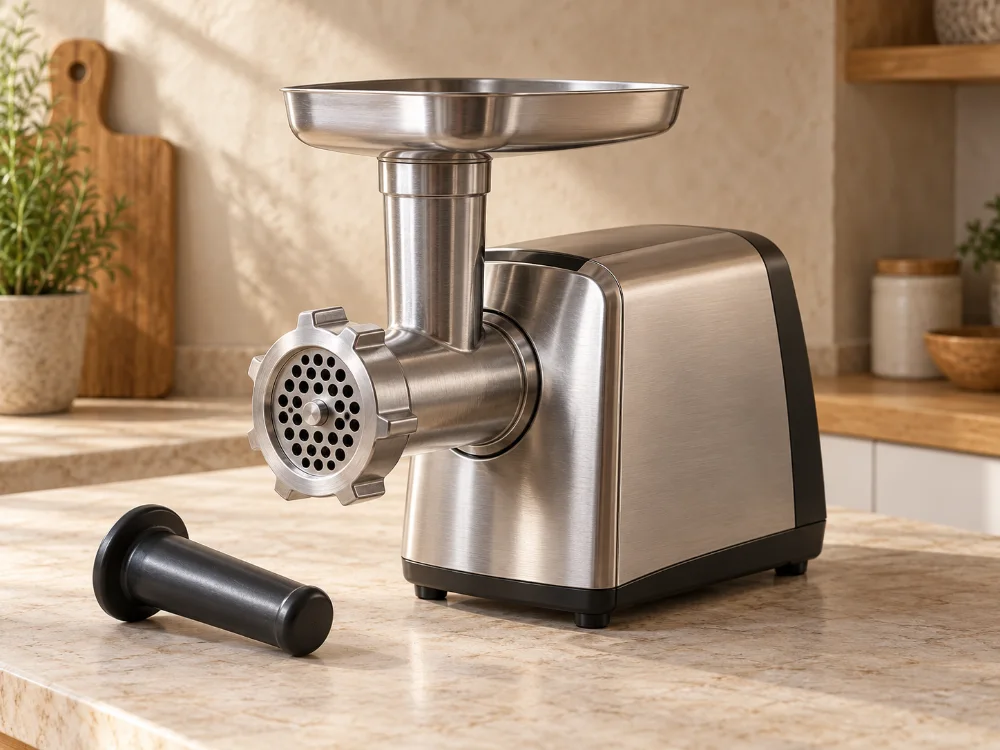
A built-in electric motor turns the grinding auger. The grinder has its own drive and controls, so it does not depend on an external food appliance or continuous hand cranking.
Limit: An electric drive does not establish a universal output rate or continuous-run time. Use the actual unit's operating instructions.
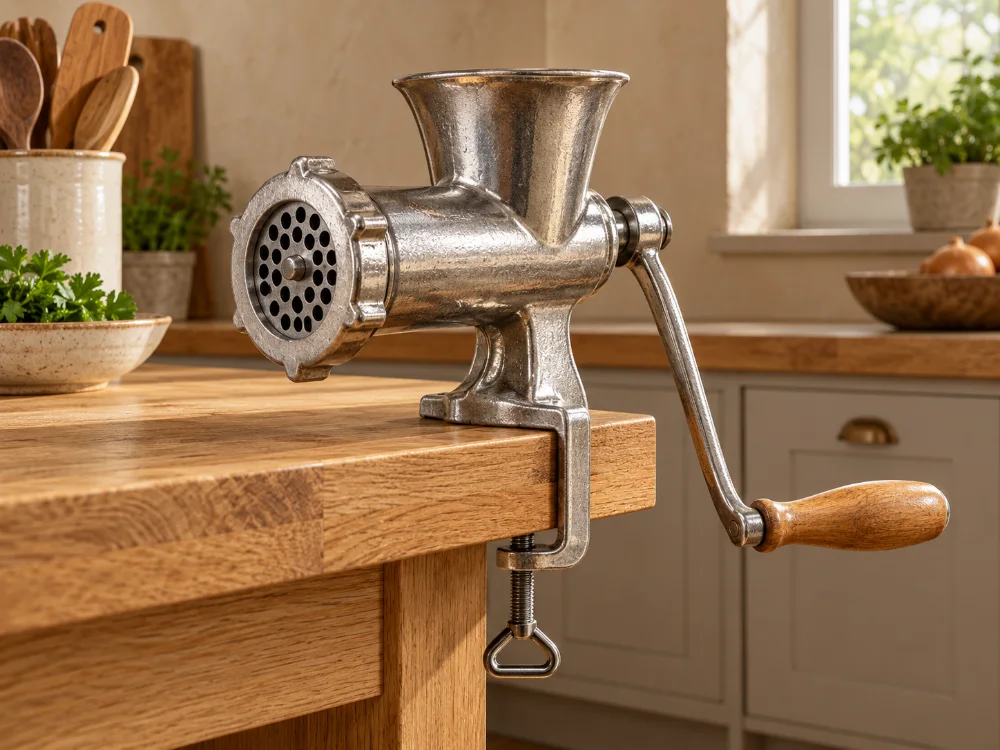
Turning a handle rotates the auger without an electric motor. Its operating pace depends on the user's cranking and feeding, making mounting stability and physical effort central considerations.
Limit: Repeated batches require repeated manual effort; hand-powered does not mean blade-safe.
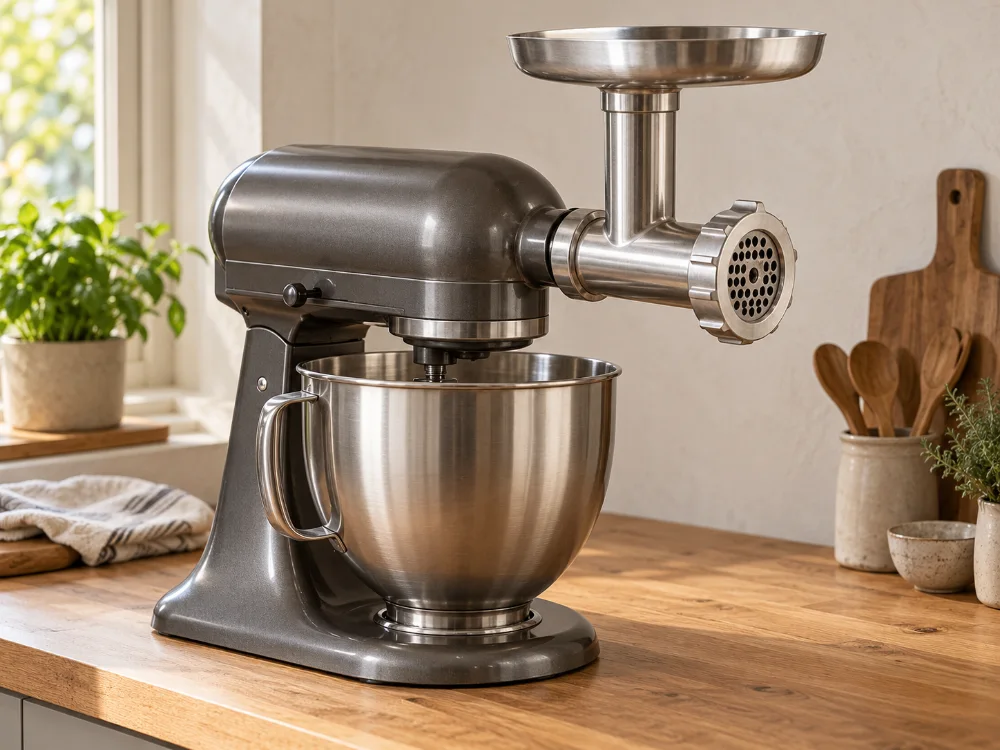
A grinder head takes rotation from a compatible appliance's driven attachment hub, typically a stand mixer. The head supplies the cutting mechanism while the host supplies the motor and controls.
Limit: Attachment interfaces are not universally interchangeable; verify host and accessory instructions.
Hand crank, integrated motor, or compatible host motor.
Compare these separately. They cannot be deduced from the drive class alone.
In a common single-stage auger grinder, a screw advances meat toward a rotating knife pressed against a stationary perforated plate. Cutting occurs at the knife-plate interface; material then exits through the plate openings. The drive source can differ without changing this basic sequence.
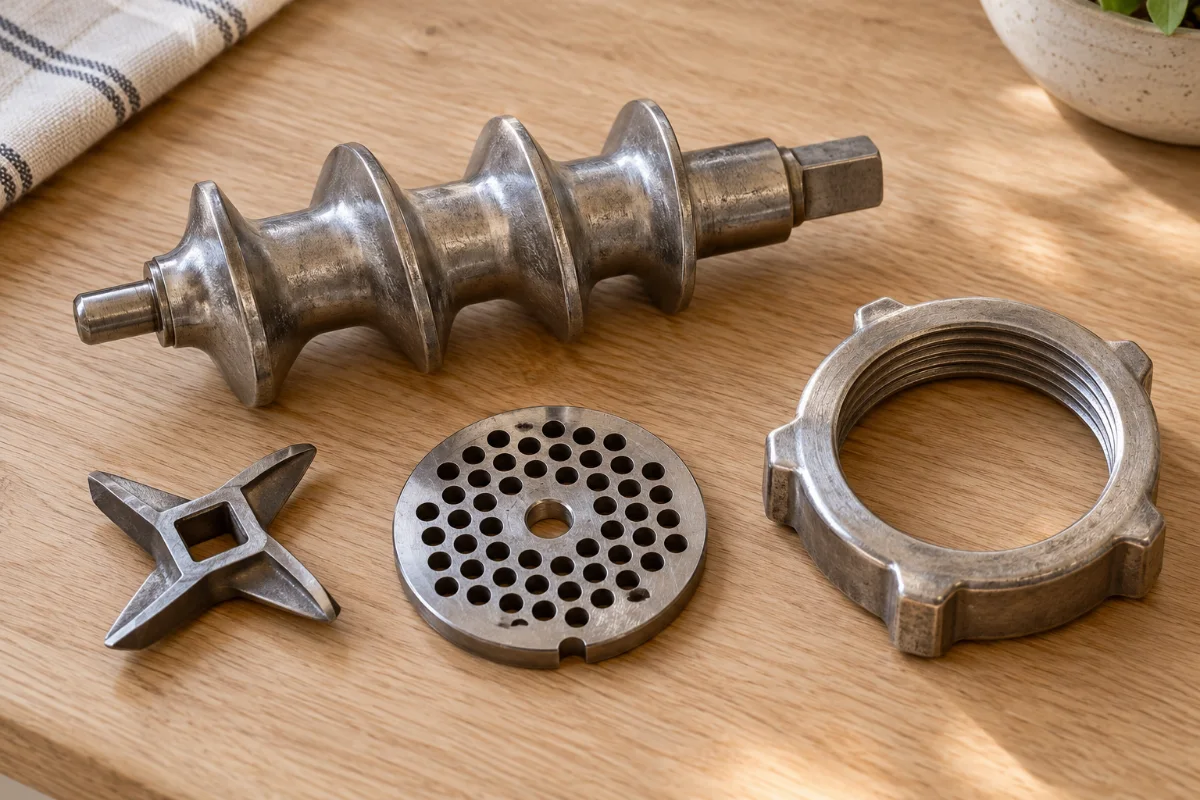
Prepared meat enters through the feed opening. Use the appropriate food pusher.
The screw auger moves material toward the cutting head.
The rotating knife shears material against a stationary perforated plate.
Ground meat passes through the plate openings into a clean container.
Separate texture, physical fit, motor rating, throughput, and operating time. These describe different things: a plate-hole measurement is not a head size, and a motor power label is not a measured grinding rate. Compare performance claims only when test conditions are disclosed.
| Specification and unit | What it tells you | What it does not establish | Practical verification |
|---|---|---|---|
| CUTPlate-hole diameter mm or in | Opening through which cut meat exits; a major determinant of the resulting grind texture. | Exact particle-size distribution, texture in every meat, or grinder capacity by itself. | Match the desired texture and check the complete cutting-set instructions. |
| CUTHole count and layout count / pattern | How the plate's open area is arranged; geometry affects feed resistance and flow. | That more holes automatically produce higher throughput on every machine. | Require comparable plate thickness, feed conditions, and tested material. |
| FITHead or plate-body size code / mm / in | Nominal head class or physical dimensions of the plate body, not the holes. | Interchangeability from a shared nominal number alone. | Check outside diameter, center bore, drive-shaft shape, locating notch, knife and retaining ring against the equipment's diagram. |
| CUTKnife and plate match profile / condition | The mating cutting surfaces that shear meat as the knife rotates. | That a plate can safely or effectively pair with any knife of similar overall size. | Use an approved cutting set; verify correct orientation and the condition of both faces. |
| RUNMotor power rating W or hp | An electrical-input or mechanical-output power figure, depending on label definition. | Auger torque, grinding rate, or sustained meat-processing ability from the number alone. | Identify input versus output, continuous versus peak basis, and operating conditions. |
| RUNThroughput lb/h or kg/h | Mass processed per unit time under the stated test or operating conditions. | Equal results with a different meat temperature, piece size, plate, or feed method. | Ask for test material, plate configuration, operating interval, and loading method. |
| RUNDuty or run-rest instruction time / duty class | Whether an applicable drive rating or equipment instruction permits continuous or intermittent work. | A universal number of minutes that applies across manual, household, and commercial grinders. | Follow the actual appliance instructions; motor duty classifications alone are not a whole-grinder certification. |
Start with the food and workflow, then choose a drive arrangement. Different tasks may use the same grinder head but require different plates, mounting, compatible accessories, or working intervals. The panels below describe defensible starting configurations, not guaranteed output capacities.
Suitable configuration: a manual, standalone electric, or compatible host-driven grinder with an appropriate knife-and-plate set. The plate opening is a major texture control; motor type alone does not prescribe the result.
Limit: Home grinding is not intrinsically safer than other properly handled ground meat. Use the USDA cold-chain and cooking guidance.
Suitable configuration: a grinder with the plate needed for the sausage's texture. Filling a casing requires a compatible stuffing horn/attachment or a separate stuffer, not merely a grinding plate.
Check: Approved stuffing setup and recipe-specific handling. An auger grinder alone is not a universal emulsifying machine.
Suitable configuration: a self-powered grinder when repeated hand cranking is impractical. Match each planned batch to documented throughput, duty limits, and the ability to keep meat refrigerated between stages.
Check: Actual operating interval and test conditions, not wattage as a shortcut.
Suitable configuration: a grinder attachment specifically compatible with the host appliance. The host supplies the motor, and its prescribed speed and load limits govern operation.
Check: Drive-shaft engagement, mounting security, approved settings and cleaning instructions; compatibility is not universal.
Suitable configuration: a hand-crank grinder if the operator can turn it comfortably and the unit can be mounted securely to a suitable surface.
Check: Stable mounting, handle clearance, safe feeding, and the user's physical effort. No motor does not mean no cutting hazard.
Follow the equipment's instructions for its particular assembly and limits. This is a general sequence for an ordinary auger-and-plate meat grinder, with food-handling rules separated from moving-part hazards.
Wash hands and start with clean food-contact parts and work surfaces. Check the head, mounting, guards, power cord if present, and pusher; do not use damaged or incomplete equipment.
Keep raw meat refrigerated until preparation. Remove bones and cut pieces to suit the feed opening and approved material limits. Keep raw meat separate from ready-to-eat foods.
Keep electric equipment unplugged while fitting the auger, knife, plate, retaining ring and feed tray. Secure the mount and all supplied protective parts as instructed; use only a compatible cutting set.
Start the machine only after setup is complete. Keep fingers out of the feed throat and away from the cutting area; never substitute a hand or improvised utensil for the properly sized pusher. Do not bypass guards.
Catch the output in a clean container. Keep waiting meat and finished batches cold, and prevent raw juices or utensils from touching cooked or ready-to-eat food. Grinding can distribute bacteria throughout meat.
Switch off and unplug powered equipment before clearing a jam, changing a plate, or disassembling. Wait for movement to stop. Never reach into an energized grinder; follow workplace energy-control procedures where applicable.
Cook ground meat to its USDA minimum internal temperature using a food thermometer, or refrigerate/freeze it without delay. Wash and clean equipment after the batch according to its instructions.
After every batch, stop the drive and disconnect power before removing parts. Wash away meat residue, then sanitize food-contact surfaces with a suitable product. A jam, damaged guard, or abnormal operation calls for a stop-and-inspect decision, not live adjustment.
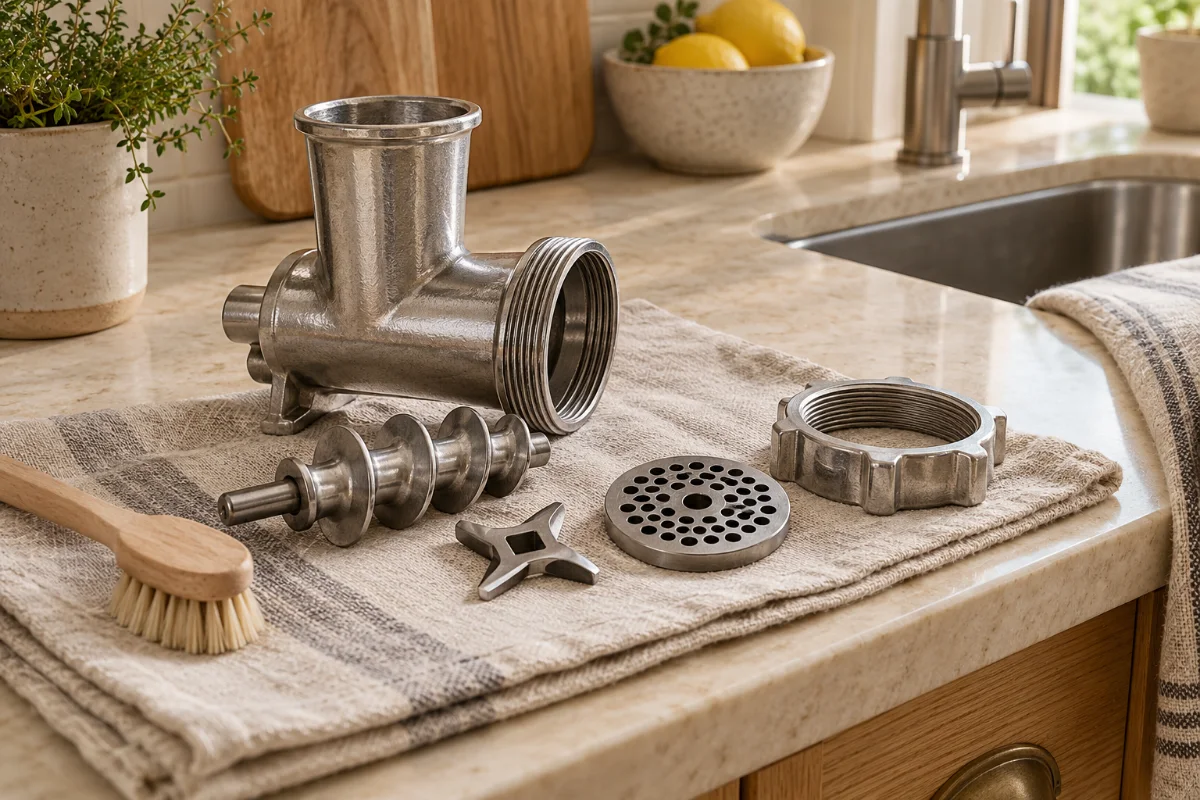
Remove soil before sanitizing; the grinder's feed tube, auger, knife, plate, and retaining parts create multiple food-contact surfaces.
Material limit: Do not assume every metal or plastic part is dishwasher-safe. Some aluminum grinder parts require hand washing; follow the actual manual.
Do not probe the head or loosen a retaining ring while anything can rotate or restart unexpectedly.
Restart rule: Reassemble all guards and parts correctly before energizing; never test a suspected fault with exposed cutting components.
These are safe first checks, not unique fault diagnoses. Always stop and isolate the drive before inspection.
| Observed condition | Check with power disconnected | Do not resume if... |
|---|---|---|
| Feed stalls or plate clogs | Look for trapped meat or connective tissue; inspect assembly and plate passages before cleaning and refitting. | The drive repeatedly stalls or a blockage cannot be removed safely. |
| Output smears or becomes uneven | Check that meat stayed chilled, and inspect the knife/plate pairing, assembly, and wear per the instructions. | Cutting edges, plate, or mounting parts show damage. |
| Unusual noise or vibration | Check external mounting security and look for foreign matter or visibly damaged components. | Noise continues, parts loosen, or the cause is uncertain. |
| Residue, film, or odor after cleaning | Reclean inaccessible-looking grooves and holes using approved tools; verify detergent and dishwasher compatibility. | Food-contact surfaces remain uncleanable, corroded, or damaged. |
| Missing guard or damaged cord | Check the approved parts list and service guidance; do not jury-rig a shield or power connection. | Any required safeguard or electrical component is defective. |
Scope: FDA Food Code cleanability rules and OSHA guarding requirements concern regulated food businesses and workplaces; they are not presented here as universal household legal requirements. At home, follow USDA sanitation advice and the equipment's own care instructions.
Use this short checklist to identify the construction and operating requirements that matter for your task.
Three shortcuts can distort a grinder decision: treating wattage as tested output, treating home grinding as a safety upgrade, and treating a nominal head label as a universal part-fit guarantee. The right checks are more specific.
Electrical input power is not the same as useful shaft output or measured meat flow. Grinding results depend on cutting geometry, screw speed, feed conditions, and meat properties. A higher wattage label alone cannot establish a faster or finer grind.
USDA explicitly cautions against that inference for ground beef. Grinding can distribute surface bacteria through the meat, and using your own equipment does not remove the need for cleaning, separation, refrigeration, and thorough cooking.
A label does not verify every mating dimension. Knife/shaft profile, plate outer diameter and thickness, center opening, locating notch or key, and retaining hardware may all affect actual fit. This is a mechanical compatibility check, not a claim of a universal published interchange standard.
Use these answers as a final category-level check. Equipment-specific compatibility, performance and cleaning still depend on actual documented instructions; food-safety temperatures and guarding principles have separate authoritative sources.
Choose between hand-crank effort, a compatible existing powered host, or a dedicated motor. Frequency and fit help narrow the route; no drive class guarantees a universal output rate.
Use installed guards and the proper feed pusher, keep raw meat cold and separate, and clean equipment between relevant uses. Industrial equipment rules can differ from home-kitchen guidance.
Opening size is one texture control, but knife/plate condition, number and layout of holes, meat temperature, and other operating conditions also influence output. There is no single independently validated opening for every recipe.
Do not assume so. Confirm the complete mechanical fit, including plate diameter/thickness, central opening, locating notch, shaft and mating knife; follow the equipment's compatible-part guidance. A head label alone is not verified interchangeability.
No reliable conversion is established for the category. Electrical input and shaft output differ, while throughput depends on feed, plate and speed conditions. Request stated test conditions and running/rest limits rather than guessing capacity from watts.
USDA lists 1-2 days for raw ground meats and poultry at a refrigerator temperature of 40°F (4°C) or below; freeze for longer storage. Keep raw meat separate from ready-to-eat foods.
USDA lists 160°F (71°C) for ground beef, pork, lamb and veal, and 165°F (74°C) for ground poultry. Measure with a food thermometer, not by color.
Only when the particular part's instructions say so. Some aluminum assemblies and metal blades require hand washing, while certain plastic accessories may be dishwasher-compatible. Clean first, then sanitize with an appropriate food-contact product.
Grinding and stuffing are separate steps. Some configurations accept approved stuffing horns; otherwise use a separate stuffer. Compatibility and operating instructions need confirmation.